posted on March 15, 2010 by Merry-Jennifer
Our suburban neighborhood is blessed to have a bakery and a fish market within its midst. I try to stay out of the bakery, mostly because the pastries are just too good to resist. The fish market, on the other hand, is a treasure trove of enticing fish and shellfish. We are only about an hour away from the Gulf coast – and some of the best fishing locations in the state – so the market has a regular supply of great fresh seafood.

As I’ve mentioned before here, I’m on a mission to learn to cook things I’ve never cooked before. I’ve never cooked scallops, but I love them, and they draw my eye when I see them in the enclosed glass case in the front of the fish market. I’ve been intimidated by scallops, but this weekend I decided it was time to get over that hurdle. So, while I took my daughter shopping for spring clothes, I sent my husband on an errand to buy scallops.
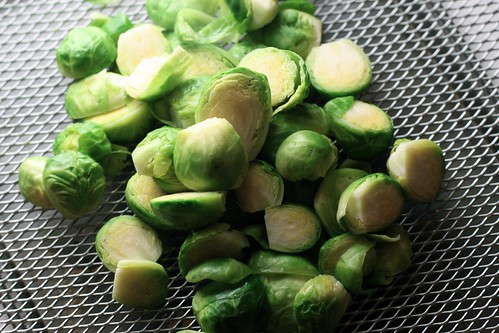
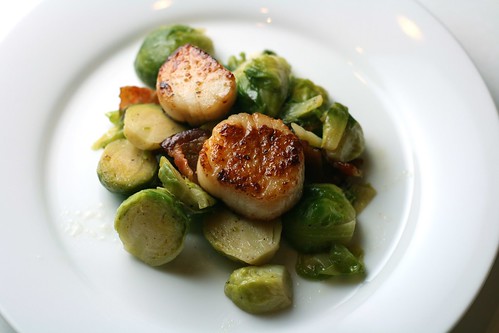
I found a recipe in Gourmet Today that I thought I’d give a try. After all, the scallops were served over Brussels sprouts with bacon. I mean, what sounds better than that?

The Brussels sprouts were fantastic, as expected. They were tender, with no trace of the bitterness that turns many people off, and the crispy bacon bits added a nice salty, smoky flavor. Searing the scallops was a bit of a challenge for me. I blame my husband for this, for no good reason except that he purchased the scallops and he was standing nearby. However, I managed to accomplish my task. And, although it was not pretty, the sweet scallops were delicious and a great compliment to the Brussels with bacon. And I forgave my husband and all was right with the world.
And before I forget, let’s talk about the wine. No meal is complete without the wine, you know. We paired the scallops and Brussels with this yummy 2005 Chalone Estate Chardonnay, and it was a great combination.

Seared Scallops with Brussels Sprouts and Bacon
Ingredients:
1 pound Brussels sprouts, trimmed and halved lengthwise
Kosher salt
4 bacon slices, cut crosswise into 1/2 inch-wide pieces
1 1/3 cups low-sodium chicken broth
1/4 cup water
2 tablespoons unsalted butter
1/2 teaspoon sugar
Fresh ground black pepper
1 pound sea scallops
2 teaspoons olive oil
1 teaspoon cornstarch
2 teaspoons fresh lemon juice
Directions:
Preheat oven to 200 degrees (for warming the Brussels sprouts when done).
Blanch Brussels sprouts in boiling salted water for 2 minutes; drain and set aside.
Cook bacon over moderate heat, turning occasionally, until crisp. Transfer bacon with slotted spoon to paper-towel-lined bowl and reserve rendered bacon fat in another small bowl.
Add 1/3 cup chicken stock and 1/4 cup water to skillet, bring to simmer, and scrape up any brown bits. Add sugar, butter, 1/4 teaspoon salt, 1/8 teaspoon pepper, and Brussels sprouts to pan; simmer uncovered for 4 minutes. Remove lid and cook over moderately high heat for another 8-12 minutes or until liquid has evaporated and sprouts are tender (to your liking). Stir in bacon, transfer to a platter, and keep warm (covered) in oven.
Wipe skillet clean. Pat scallops dry and season them with 1/4 teaspoon salt and 1/8 teaspoon peper. Heat oil with 2 teaspoons of the reserved bacon fat in the skillet over moderately high heat until the oil/fat begins to smoke. Add scallops and sear, turning once, until golden brown and just cooked through, 4-6 minutes. Transfer to another platter and cover loosely with foil.
Pour off any remaining fat from skillet. Add remaining 1 cup chicken stock, bring to simmer, and scrape up any brown bits. Simmer for one minute. Stir cornstarch with 1 tablespoon water in a cup, then add to sauce (along with any juices accumulated in scallop platter), and simmer for 1 minute. Remove from heat and stir in lemon juice and salt and pepper to taste.
Serve scallops over the Brussels and top with sauce.
posted on March 13, 2010 by Merry-Jennifer
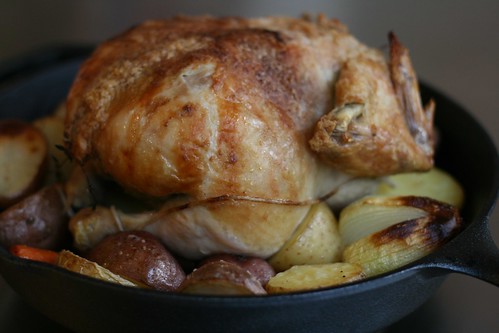
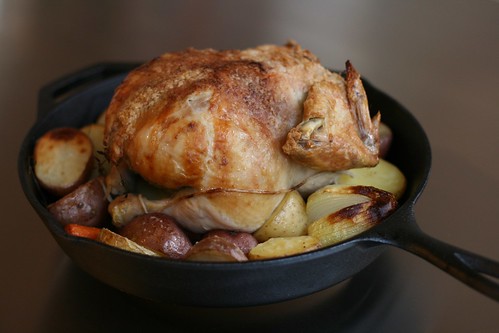
“How did you get the skin so crispy?” It was the first thing my husband asked me as he started carving the bird. I took this as an indicator that this recipe, although we had not tasted it yet, was going to be a great one.
Let me back up a bit. Before I made this, I had only roasted a chicken once before – years ago, when I was just starting to learn to cook. Unfortunately for me, that first chicken had a few scraggly feathers still left on it when I unwrapped it from the grocer’s plastic. Those few chicken feathers immediately conjured up images of happy white-feathered hens clucking around the yard, and that train of thought led me to think of the pet chicken we owned when I was a kid. Dixie was a sweet hen who, in all honesty, thought she was a dog. Her best friend was our dog, Jesse, and she was always at Jesse’s side.
So, those feathers left on that raw chicken made it really difficult for me to roast and cut up the bird. And I certainly did not enjoy one single bite of it. And, because I was acting so squeamish about the whole thing, I’m sure my husband didn’t enjoy it either. He ate it, but I think he was expecting a good case of food poisoning after the experience.
But this is a new era for me. Time – and practice in the kitchen – have helped me become less squeamish about handling raw meats, including chickens with scraggly feathers left on them. So, I decided it was time to roast a chicken again.
I’ve mentioned this before, but Thomas Keller’s Ad Hoc at Home is a fantastic book, and he has a wonderful recipe on page 22 for roasting a whole chicken on a bed of root vegetables. What I love about his recipes is that he gives great tips before each recipe for how to ensure a perfect result. At the beginning of this recipe, Keller says,
The root vegetables make a bed for the chicken, and the rendering fat and juices from the chicken flavor the vegetables. If you have a big cast-iron skillet, use that.

For the crispy skin, which was the first thing my husband noticed, Keller advises,
We also often leave it uncovered in the refrigerator for a day or two, which dries the skin and thus helps it to crisp during the roasting.
Adam Roberts of The Amateur Gourmet has written a post detailing the recipe from Keller’s book, so I’ll refer you there for the details.
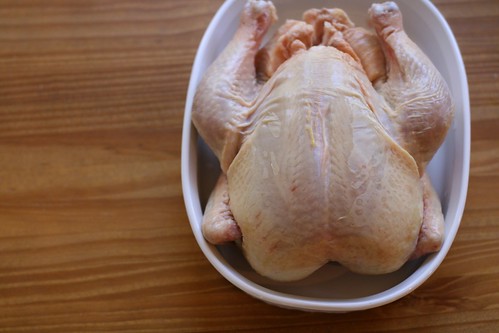
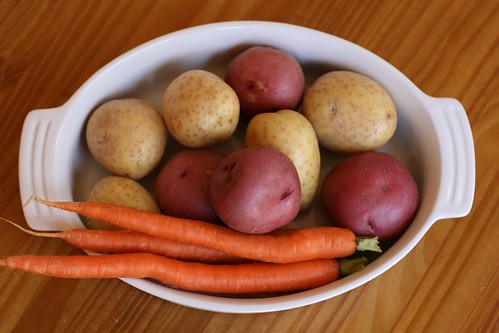
I used the vegetables that I had on hand, which did not include the rutabagas, leeks, and turnips that the recipe calls for. Instead I used some red new potatoes, small Yukon gold potatoes, a yellow onion, and some carrots. I also used the new Lodge cast-iron skillet I purchased about a month ago. And, since I didn’t know that I was going to roast a chicken two days prior to making it, my chicken sat uncovered in the fridge for about six hours.
And the chicken? It had intensely flavorful, crispy skin and was moist and tender on the inside. The vegetables were the most flavorful roast vegetables I’ve ever made, thanks to the rendered chicken fat in the skillet. I still need to practice my chicken trussing technique, but that’s simply a cosmetic issue.
So, thank you, Mr. Keller, for the perfect recipe for reintroducing me to roasting a chicken.
posted on March 10, 2010 by Merry-Jennifer
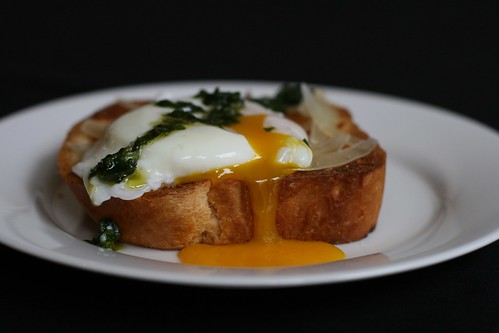
I must confess something. Prior to this meal, I have never poached an egg. I have eaten poached eggs, but I have never made them myself. It has been on my to do list for some time. So, today, I poached my first egg.
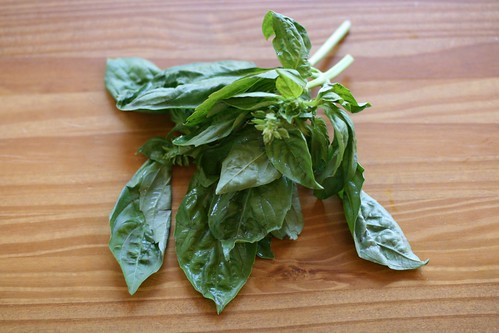
I made the pistou in my mini food processor using some basil leaves, extra virgin olive oil, and garlic. My basil plant died this winter, so I had to buy some for this dish. I fully intend to have basil in my new garden. Did I mention I’m going to be starting my first garden? It’s very exciting.
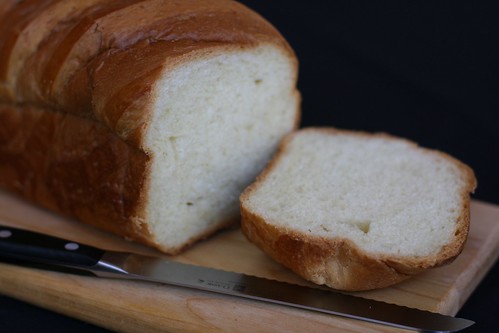
Our local bakery, The Flour Pot, makes a wonderful brioche. I picked up a loaf this morning, and it took all I could do to resist eating it before lunch.
I toasted a slice of brioche, shaved some parmesan cheese over the toast, topped it with one poached egg, and then sprinkled the pistou and some fleur de sel over the top. It was fabulous. And gone within about 30 seconds.
Lessons learned today:
- Poaching an egg is not rocket science, but it’s not the easiest thing either. I’m sure with practice I’ll figure out how to get rid of those trailing strands of egg white.
- Poached eggs are divine.
- Pistou is a great addition for ramping up flavor. So is fleur de sel.
- I need a personal photographer to capture some of the more interesting steps of the process – like the egg poaching part. I’m not sure my husband will give up his day job, though. I can’t pay that well.
 Print
Print


