guest post: browned butter rice krispies treats
I’m right in the middle of an 18-day stretch of work, so posting — and cooking, photographing, housekeeping, gardening, and spending time with my family – has been a bit challenging. To top it off, we lost a beloved pet – our almost 17 year old cat, Fritz – on Mother’s Day. All of this is to say that I could really use a break right about now.
Thanks to my friend, Brian, from A Thought For Food, I don’t have to leave you all completely hanging. When I asked him if he’d be interested in posting here, he graciously accepted, and I’m so glad he did. Brian has been writing his beautiful food blog for almost two years – he celebrates his two year anniversary in June – and it’s one of my favorites to read. His photography is stunning, with a warm, vintage feel to his food photos that draws the viewer in. He has quite a way with words, and his recipes are always inspiring. I’ve never met Brian in person, but when I make it up to Boston one day, I plan to remedy that.
You can connect with Brian on Twitter and on Facebook, and, of course, through his blog. And you really should.
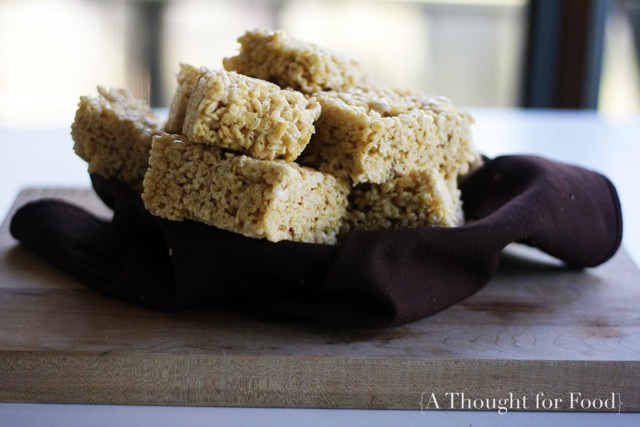
When Merry-Jennifer asked me to do a guest post for her beautiful blog, I immediately knew that I not only wanted to make something that she would enjoy, but a recipe that her kids would have fun making (and eating) as well.
I’ve always enjoyed MJ’s ability to have balance in her life. She juggles her work, her children, her blog… her husband (had to throw him in here, because we all know how much work that can be)… so seamlessly, I wonder how she stays sane. But she does, and she does it all with a big smile.
In a way, MJ is a kid at heart. She’s incredibly hard working and focused, of course, but she also has a playfulness to her. Which is why I couldn’t think of anything better to share on The Merry Gourmet than this recipe for Brown Butter Rice Krispies Treats.
You may be thinking, “Really, Rice Krispies treats? You couldn’t think of anything slightly more sophisticated?” But before you judge, just try them.
The recipe comes from the Flour Bakery Cookbook, a recent release that has become a favorite of mine. The Flour Bakery is a Boston establishment, and almost anyone you talk to has a story to tell or a favorite pastry they recommend. Now, prior to making these treats, I had never had them from the store. In fact, I don’t think I’ve had a Rice Krispies treats since elementary school.
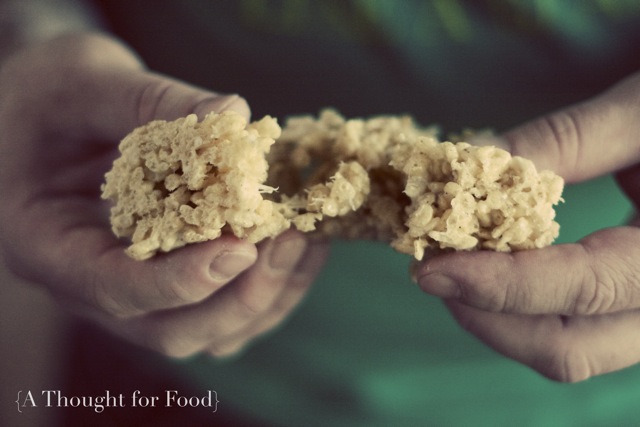
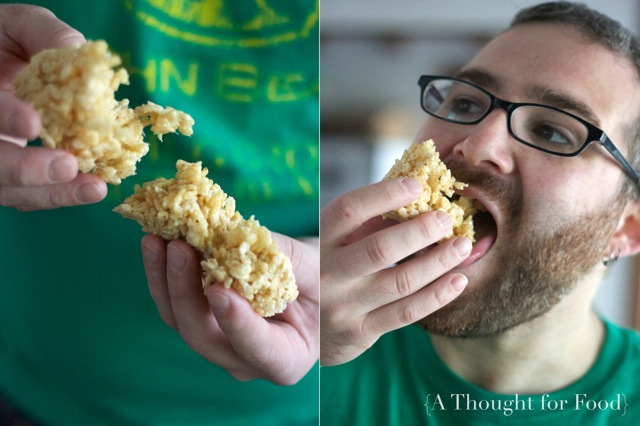
But the first bite of this decadent dessert brought on an enormous grin (and a giant, almost sensual, moan).
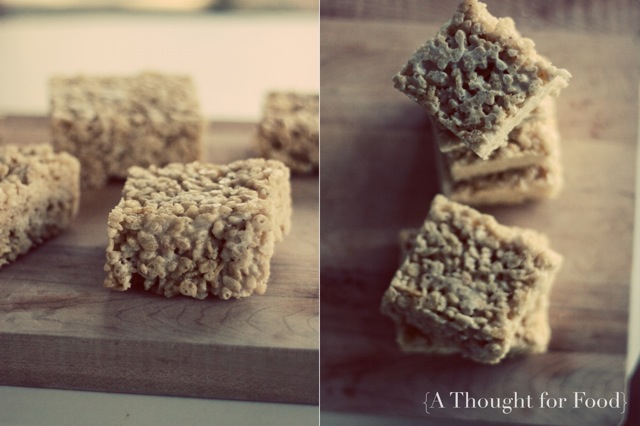
If you aren’t quite getting how incredible these are, maybe this will do it: take a look at the ingredients below and note the quantity of butter. That’s right… two sticks. Two sticks of butter, that has been browned in a pan, releasing a wonderful, nutty flavor. Then it’s mixed with two bags of marshmallows, tossed with a box of rice cereal, and spread across a pan. These aren’t just the simplest dessert you can ever make, but they are dangerously addictive as well (Eric, my husband and model, and I had a tough time stopping ourselves from taking slivers off them). I highly recommend giving away at least half of them right away.
Otherwise, I can guarantee they won’t last more than a day.
Browned Butter Rice Krispies Treats
From Joanne Chang's Flour: Spectacular Recipes from Boston's Flour Bakery + Cafe.
Ingredients:
1 cup (2 sticks) unsalted butter
1/2 vanilla bean
2 10-oz bags marshmallows
1/2 teaspoon kosher salt
9 cups crispy rice cereal
Directions:
Spray a 9x13-inch baking pan with cooking spray.
Add the butter to a large saucepan set over low heat. Scrape the seeds from the vanilla bean into the pan with the butter. The butter will melt then begin to bubble and foam. Eventually it will start to turn brown and smell nutty - be patient and watch carefully, it can go from brown to burned quickly. Once the butter is browned, add all of the marshmallows and the salt. Stir the mixture constantly until the marshmallows are completely melted.
Turn off the heat under the pan and add the cereal. Use a rubber spatula or wooden spoon to coat the cereal evenly with the buttery, marshmallow liquid. Spread the mixture in an even layer in the prepared baking pan. Let cool for at least an hour before cutting and serving. You can store the treats in an airtight container at room temperature for 2 days.

 Print
Print



Pingback: {Recipe: Brown Butter Rice Krispie Treats}
Are you kidding me! I wouldn’t dream of giving away something that good. There’s nothing better than the smell and taste of browned butter is there?
You are so right, Sylvie. These would be way too hard to part with.
Have not had crispy treats since Girl Scouts! We don’t need to mention exactly how long ago that was. ;o)
2 sticks of butter. Decadent! Nutty browned butter. Outrageous!
I look forward to trying these, but agree with Sylvie, not sure I could give these away, even if I should.
Thanks Brian, and MJ too!
(@downbythehearth)
They do look amazing, don’t they? These are for keeping. 🙂
Not for one second did I think these weren’t sophisticated enough. I know just how much flavour brown butter adds to a dish and transforms it from oridinary to addictive.
A great post and I’m glad I had a chance to head over here and browse through the rest of the blog. All love, by the way!
Aw, thanks so much, Mike!
MJ: So glad to see Brian guest posting here. He is my favorite food photographer 😀
Brian: I love Joanne Chang’s book, my copy is full of colored flags and every recipe I’ve tried has been successful. I will definitely try these.
Happy Wednesday!
I’m so happy to have discovered your blog via Brian’s. I recently came across a Rice Krispie Treat recipe that involved rosemary and lavender. (Drool.) I think the addition of those to these browned butter ones would send this dessert out into orbit. Oh goodness, that sounds so delicious!
Molly – that sounds like an intriguing combination (rosemary and lavender)! And, welcome!
Thanks for sharing, Brian! I’m so glad you guest-posted so I could find your site!
These look like an all-grown-up version of the favorite sweet! I have to try this! Isn’t MJ amazing juggling all that? So inspiring!
Christina (Dessert for Two) – you will love Brian’s site!
I love butter! Especially, brown butter! It’s so great reading guest posts and getting a glimpse inside to how wonderful relationships are formed in the blog world. I admire both of you, for obvious reasons-like well versed-blog post, stunning photography and super incredibly creative recipes.
Funny, I’ve never been a fan of rice crispy treats. I’m more of a rich creamy, chocolaty type… though the brown butter had me at Hello!
Sending you the sweetest wishes MG for Fritz – boo! Thank you for another delightful post Brian!
I think anything with brown butter would be darn hard to pass up. Thank you so much for your good wishes. It stinks to lose a pet, but we’re getting over it, slowly.
Love how this kid recipe can be turned into an adult version by transforming the butter! Thanks for sharing Brian! I just discovered your blog MJ and I will definitely be back. Hope you get some rest in these 18 days!
Thank you so much, Nelly. Nice to have you here!
That addition of vanilla bean is genius!
Right? Love the entire recipe.
MJ, I’m so sorry about your kitty. Losing a pet sucks. 🙁
Brian, those look insanely delicious.
Thanks, Kare!
So sorry to hear about your kitty and tough work schedule right now. Sounds as if you are a master at delegating by choosing a guest post at the perfect time. Brown butter makes such a fun, childhood treat all grown-up. Love the post, recipe and photos. Hope things settle for you soon!
Thank you so much, Elizabeth. I love to delegate when I can. 🙂
The sound of these has me drooling! A way to make Rice Krispie treats better???? I’m all for it…these sound divine, Brian!!! Merry Gourmet, so nice to visit your blog…I’ll be back 🙂
Brian thanks for this fun post! I think this not only kid-friendly but adult friendly 😉 Thanks for introducing me to MJ. She sounds like a my type of person to follow.
I already have a hard time resisting Rice Krispies’ treats. Now with brown butter? I’m a goner!
Wonderful guest post! Wow…those are just amazing…soooo delicous! 2 sticks of butter?! I am so sold, it’s not even funny haha
Hello MJ, I’ve just dashed over from Brian’s place…so nice to learn more about you! I applaud your decision to take a break. Try as we may to have it all, if balance is not in place, the smooth ride we covet will become bumpy. You have my condolence for the loss of your family’s beloved pet. Please remember: In taking care of you, you retain the privilege to take care of others.
Normally if it says Brown(ed) Butter I’m totally in but maybe it’s the kid in me…I didn’t even need that! I love, love, love Rice Krispies treats and I realized earlier today that a lot of the things I love are no longer being made because my youngest child has now moved on and there is no need. But…think I was wrong and just love this updated ‘adult’ version.
I used to make these for my childrens school lunches. My recipe includes peanut butter but I’ve never made them with brown butter. Sounds delicious.
Fabulous! I must make these soon!
I’m completely touched by this post. I love food blog buddies and how we all have each other’s back when we need them. Hugs to BOTH of you!!
And for the treats…I think I need browned butter in my life. I want to eat these in bed tonight.
Woohoo! These were perfect to stare at after a really, really long day. Great post! 🙂
Yes, the rice krispie squares are both kid and adult friendly, but when I think of rice krispies, I think of comfort and sharing amongst friends and I can’t think of two more caring people than both you and Brian.
I’m sorry to hear about Fritz. 17 years in that house, he must have given and received a lot of love.
Thanks so much, Ethan.
Two sticks of butter in one batch of rice krispies treats? You just gave me chills, mister. CHILLS. In a good way.
So funny, I hadn’t had a rice krispie treat until a few weeks ago when I made a cake batter version. This sounds great with the browned butter and addition of vanilla. I’m seeint these will be appearing again in my near future!
I’ve been hearing about this cookbook- WANT, and this recipe has gotten some buzz too. Must make these as soon as possible!
I don’t have the cookbook either, but I have a feeling I’ll own it soon. 😉
I think the addition of brown butter ups the rice krispie ante by a lot! The pictures have made me feel nostalgic for the much-loved childhood snack. 🙂
They look amazing, don’t they? Now I must buy some Rice Krispies…
What a great way to “grow-up” a childhood favorite! Sounds wonderful!
MJ, hang in there as you get through this crazy time. I, too, admire how you are able to juggle all you do. Hugs to you – my heart goes out to you with the loss of Fritz. He was such a good looking buddy.
Thank you so much, Liren. It’s been tough, but we’re getting used to the idea that he’s gone.
Brian – What an amazing twist on rice krispie treats… Can’t wait to try these!
MJ – Hope everything’s going well for you… Hang in there!
Thanks, Jen. I’m doing better.
Hi MJ-I was so sorry to read on Mother’s Day that your sweet kitty Fritz passed away:( I do believe you need a Mother’s Day do-over like you mentioned . (((big hugs)))
Bri-LOVE these rice krispie treats! My kids love rice krispie treats. I will make these with them. They look so tempting!!:)
Thank you so much, Lora.
I love Brian! He is one of the most generous, talented and nicest bloggers I can think of. And most talented too. Great post!
Pingback: Friday Favorites – Episode 92 | my kitchen addiction
Brown butter AND a vanilla bean? These sound fantastic! I think I’ll whip up a batch for our camping trip! 🙂
Pingback: White Chocolate Cranberry Pecan Rice Krispy Treats. « Chef Pandita
Has anyone tried this with regular butter instead of unsalted? Would it just be too salty or something using regular butter and omitting the Kosher salt? I would think it would be fine.
Erich – I’ve not tried that. I tend to cook and bake with unsalted butter – which allows me more control over the salt content of the final dish. There’s a lot of butter in this, so my guess is that it might be too salty if you used salted butter. Give it a try and report back!
Pingback: Browned Butter Rice Krispy Treats with Vanilla bean
I have made these 3 times now and we loved them. I just posted them!
These are to die for! I took them to tennis one day and even with the small turnout that day, they were gone in a flash. Awesome recipe!
Thanks for that feedback, Rosie! I’m so glad to hear they were a success.
Pingback: Browned Butter Pumpkin Spice Rice Krispies Treats | Test
Pingback: Caramel Spice Pumpkin Pie Recipe | Eat the Love
Pingback: Brown Butter and Vanilla Bean Rice Krispie Treats for Band Camp « Bee*s Adventures
What a great idea – I love the layers of flavor this recipe produces. You can’t go wrong with browned butter!
Pingback: White Chocolate Cranberry Pecan Rice Krispy Treats.
Pingback: Brown butter rice crispy treats with sea salt & vanilla | Lucy Cakes