posted on April 6, 2010 by Merry-Jennifer
We spent a Sunday evening at my parents’ house recently. My husband and I decided around lunchtime that day that we’d invite ourselves over since we hadn’t seen my parents in a week or so. Our plan was have an easy dinner of burgers and roasted potatoes. My children love going to their Nana’s house, and they were thrilled when we told them of our afternoon plans. It was a lovely warm spring evening, perfect for firing up the grill and taking advantage of the beautiful weather.
I grew up in a small town in northern Florida, just about 45 minutes from where I live now. I wasn’t born there, but I spent all of my remembered young life there. The town had a population of 500 people then, and the population now is only about 30 to 40 people higher than that. There was one blinking light at the crossroads in the center of town. It wasn’t until I went away to college that the county replaced the blinking light with an actual stoplight. The stoplight took some getting used to; there were lots of red-light runners in the beginning.

My parents lived – and still live – just outside the town limits, down a dirt road, with no real neighbors to speak of. In fact, I think that a big part of why I now live in my little preplanned, white-picket-fence-wrapped neighborhood is because I craved a real neighborhood for so long. With white picket fences. And neighbors.


I didn’t care all that much for my little hometown by the time I was a teenager. It was so isolated, with too many green cow pastures, too many farms, too many innertube rental places, too many trees, and not enough happening. I was a country girl (yes, I’ll finally admit that) who craved a city life. Not even a huge city, mind you. Just one with more than one stoplight.

Flash forward to 2010. I’m married with two children of my own – a six year old daughter and a three year old son – and we live in a lovely little neighbhorhood in a city with close to 259,000 people. My kids ride their bikes up and down sidewalks instead of county roads and dirt lanes. There are homes to our right and our left, and in the early evenings we can sit on our front porch and watch the neighborhood kids hanging out with their friends – walking together, riding scooters, or whatever else kids do.
And now? Now I adore visiting my parents in that tiny little north Florida town where I grew up. I have a new respect for the peacefulness and serenity that come with life in a small town. I love the green cow pastures, the farms, the trees, the lack of people, the quietness. And despite how tacky they are, I have even become fond of the innertube rental shops that fill with tourists in the summer months.

And the burgers out there are really good, too.
posted on April 2, 2010 by Merry-Jennifer
I love grits, as you may remember from this post. Every now and then I get a craving for them, and the grits craving hit me very hard just recently. I must have seen something or read something about shrimp and grits because, for a solid week, I could not get them off my mind.

For the grits, I adapted my favorite recipe from Gourmet. Instead of whole milk and heavy cream, I lightened things up a bit with low-fat milk and half-and-half. Honestly, I’m not sure I would notice the difference. Okay, maybe I would. But, in the name of Eating Healthier, I’m sticking with my lower-fat version. Also, I don’t add cheese to my grits, but you could if cheese grits float your boat.


The shrimp were local, caught in the Atlantic off the St. Augustine coast and sold by our local fish market. After shelling and deveining them, the shrimp were sauteed in rendered bacon fat and other goodness.

The cooked bacon crumbles and some sliced green onions were sprinkled on the top of the dish prior to serving. The combination of the creamy grits, the tender shrimp, and the smokiness of the bacon was just mouthwatering.

Ingredients:
Ingredients for the grits:
2 cups water
2 cups 1% low-fat milk
1 cup white stone-ground grits
1/4 cup half-and-half
1/4 stick unsalted butter, cut into pieces
1 teaspoon kosher salt
Ingredients for the shrimp:
4 slices bacon, cut into 1/2- inch pieces
2 tablespoons pure olive oil
3/4 pound shrimp, shelled and deveined
3 cloves garlic, finely chopped
pinch of crushed red pepper
1 teaspoon fresh thyme
salt and freshly ground pepper
3 green onions, thinly sliced, for garnish
Directions:
Prepare the grits:
Bring water and milk just to a simmer in a 4- to 5- quart heavy saucepan. Meanwhile, cover grits with water in a large bowl and whisk vigorously. Let the grits stand for 30 minutes then skim off any chaff that has floated to the top. Drain grits well in a fine-mesh sieve and whisk into the simmering milk mixture.
Reduce heat to low and simmer grits, partially covered, stirring often with a heatproof rubber spatula until the grits are tender and thickened to the consistency of loose oatmeal, approximately 1 1/4 hours. Stir more towards the end of cooking. If the grits thicken before they are tender and creamy, add 1/4 to 1/2 cup hot water to thin the grits.
Stir in cream, butter, and salt. Remove from heat and keep warm, covered, until ready to serve.
Prepare the shrimp:
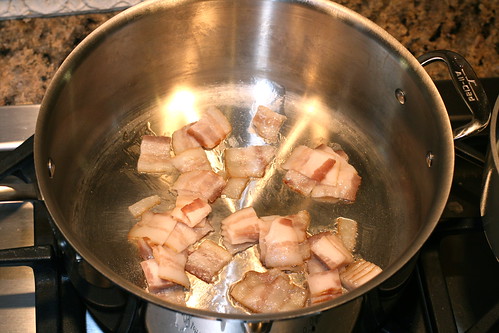
Place bacon in a medium skillet over medium heat and cook until golden brown and crisp and the fat has rendered. Remove bacon with a slotted spoon and transfer to a paper-towel lined plate.
Remove all but 2 tablespoons of bacon fat from the skillet and place back on heat. Add olive oil and increase the heat to high. Season the shrimp with salt and pepper. Add shrimp to the pan with garlic, thyme, and crushed red pepper. Saute until golden brown on both sides and just cooked through, 1-2 minutes per side. Remove shrimp to a plate. Pour the garlic oil from the skillet through a fine-mesh strainer, and reserve the oil to drizzle over the finished dish.
Divide the grits among 4 bowls and top each with some of the shrimp. Drizzle the top with the reserved bacon-garlic oil, and sprinkle some of the cooked bacon bits and sliced green onion over the top.
The grits were adapted from this recipe in Gourmet and the shrimp recipe was adapted from Bobby Flay's recipe here.
posted on March 31, 2010 by Merry-Jennifer
I’m a big fan of oatmeal. I grew up on Quaker quick cooking oats, which I still like well enough, but over the past year I’ve developed a real love for the steel cut variety. When prepared well, they have a great taste and texture – slightly chewy and with a bit more nutty flavor than quick-cooking oats. The only downside of steel cut oats is the time it takes to make them.

There is a solution and it’s called…the slow cooker! You know that I’m a big fan of my ancient slow cooker, and for making steel cut oats, it’s the only way to go. Not terribly long ago, I found a recipe on Food 52 that has now become my favorite way to prepare them. The basic recipe is here, and it’s so simple to follow.

The only change I make to the recipe when I prepare the oats is to use skim milk or 1% milk (depending on what’s in the fridge) in place of the one cup of whole milk.

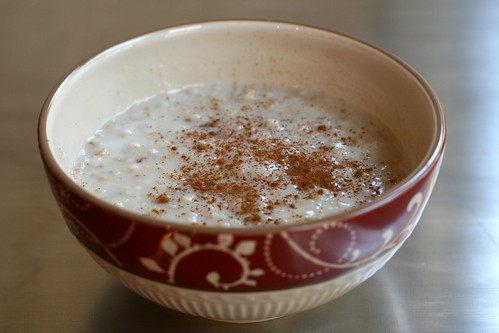
The toppings are entirely up to you. This time I used honey, golden raisins, and a dash of cinnamon. I’ve also used dried cranberries and maple syrup, but my favorite topping is honey and banana.

And one of the best parts of making steel cut oats in the slow cooker is that there is always leftovers, perfect for a quick but healthy breakfast as I’m trying to get out the door during the weekday mornings.
Yield: 3 to 4 servings.
Prep Time: 5 minutes
Cook Time: 8 hours (or overnight)
Slow-Cooker Steel Cut Oats
This recipe slightly adapted from ying's, on Food52, here. I encourage you to visit the Food52 site yourself - it's a great one for finding community-sourced recipes. Serves 3-4, depending on appetite.
Ingredients:
2 cups water
1 cup low-fat milk
1/2 cup steel cut oats
1 pinch kosher salt
toppings of your choice - sliced banana, raisins, honey, sliced almonds, etc.
Directions:
In a 4-cup glass measuring cup, stir together milk, water, oats, and salt. Place in a large slow cooker and add enough cold water to come about half-way up the outside of the glass measuring cup which holds the oats mixture. Turn on low for 8-10 hours (overnight).
In the morning, stir oats well – it should be very creamy. Mix in your choice of toppings prior to serving. Enjoy!


 Print
Print


